How to Roster Manually
All customers with digital subscriptions are eligible to use our manual self-service rostering. For school or district orders that include the Reading Playgrounds, our manual rostering tools make it easy to roster teachers and students in the Really Great Reading licensing platform.
When manually rostering, you have the choice to add teachers and students one-by-one, or you can use our CSV template to perform a self-service bulk upload. The bulk upload tool is the fastest way to get your teachers and students added to the Really Great Reading licensing platform.
As a district or school administrator, you can add teachers on an individual basis or as a bulk upload.
- As a school administrator, log into the dashboard and select the Educators tab. As a district administrator, log into the dashboard and select the District Users.
- To upload Educators in bulk:
- Download the Educator CSV template.
- Populate the template with educator information (do not change or delete the headers)
- Save the file as a CSV
- Return to the Educator tab in the dashboard, select Upload Educator CSV File and complete the upload process.
- Once the file is ingested, the educators will be populated in the dashboard.
- To add educators individually:
- Click on the Add New Educator/Add User button.
- Complete the form and save to add your teacher.
District Administrators
District administrators can quickly add students using the steps below. This is ideal for adding individual students to any school in your district.
To add students, go to the Students tab on the dashboard and use the “Add New Student” button in the upper right-hand corner.
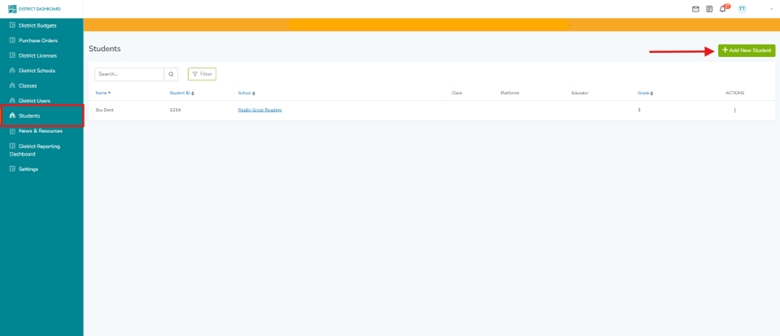
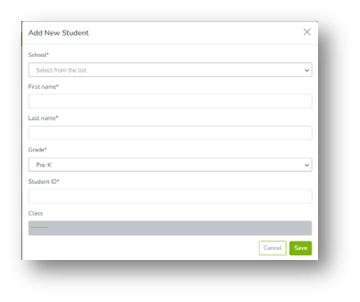
Complete the form for each student.
To ensure students are rostered correctly from year to year, it is important to enter the student’s real first and last name along with their Student ID.
When entering student ID numbers, we highly recommend using SIS ID or student State IDs. Your SIS manager can provide this information.
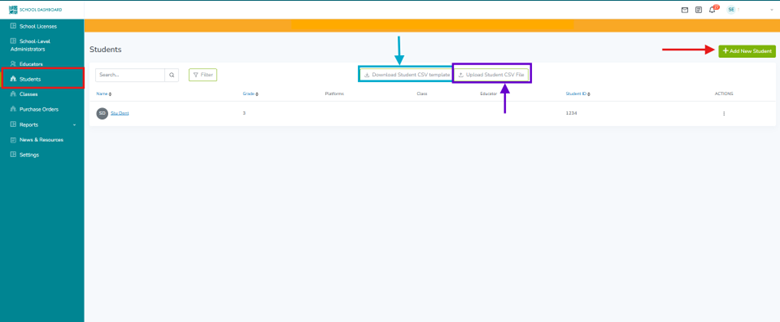
School Administrators can add students individually or in bulk. To add students individually, use the “Add New Student” button on the Students tab of the dashboard.
When entering student ID numbers, we highly recommend using SIS ID or student State IDs. Your SIS manager can provide this information.
To upload students in bulk:
- Download the Student CSV template.
- Populate the template with student information.
- do not alter column headings
- do use student SIS IDs or State ID numbers
- Save the file as a .csv.
- Return to the Students tab in the dashboard, select Upload Student CSV File and complete the upload process.
- Once the file is ingested, the students will be populated in the dashboard.
- Confirm the student data is correct.
Teachers can add students individually as they step through the class creation process on the teacher dashboard.
- After creating a name for your class, the wizard will prompt you to add students to your class.
- You may add multiple students to your class before moving on to assign licenses.
- Teachers can also add students individually from the Teacher Dashboard when viewing the “All Students” page (available from the Manage Class page or the utility menu in the upper right corner under the educator’s name). On the All Students page, use the “Add New Student” button to add a new student to the class.
Need help with manual rostering? Email our team or give us a call at 866-401-7323 x 5